We began before we started. While we were still looking into
the possibility of building a tiny house, our community partners were stepping
up to provide critical support to really
get the project off the ground. With early(and constant) enthusiasm from CHS
principal Rianne Pfaltzgraff and ROP principal Lindi Huntsman we had early
commitments from:
Tumbleweed Tiny
House Company
Tumbleweed donated a full set of plans and documents for
their 20’ Cypress Equator model. They included the plans for the optional
dormer style roof (more space in the bedroom loft) and the plans for a great
addition of a stair/drawer unit.
Ashby Lumber Company
Ashby donated the bulk of the rough framing, Para-Lam
structural members (for our rear wall that is mostly door and windows), loft flooring,
and nails and fasteners. Knowing we could frame it got the project rolling.
West Coast Windows
and Doors
West Coast really stepped up by not only providing windows
for the project, but by ordering the sizes, quantities, color, and styles
called for in the plans. We did not have to learn about sizing and ordering
windows while also learning about change orders in the field!
We will keep you posted as we seek out additional community
partners in our search for: An event tent (the rain is tough on us this year –
but NO complaints) or a canopy to use with our framework; Electrical rough-in
and fixtures (including 12 volt); Plumbing rough-in and fixtures (including RV
hook-ups), interior and exterior siding, insulation, air conditioning, and
roofing.
 Our 20' trailer
 Dec. 1, 2015: Settled in and looking like a beast. Ours for the next 6 months...
 Blocked, level and two rows of flashing!
We took the wheels off and leveled it to +/- 1/16" at the 4 corners. We've decided we love the self-leveling laser level!
 |
| FLASHING FLASHING FLASHING |
 |
| FLOOR-FRAMING |
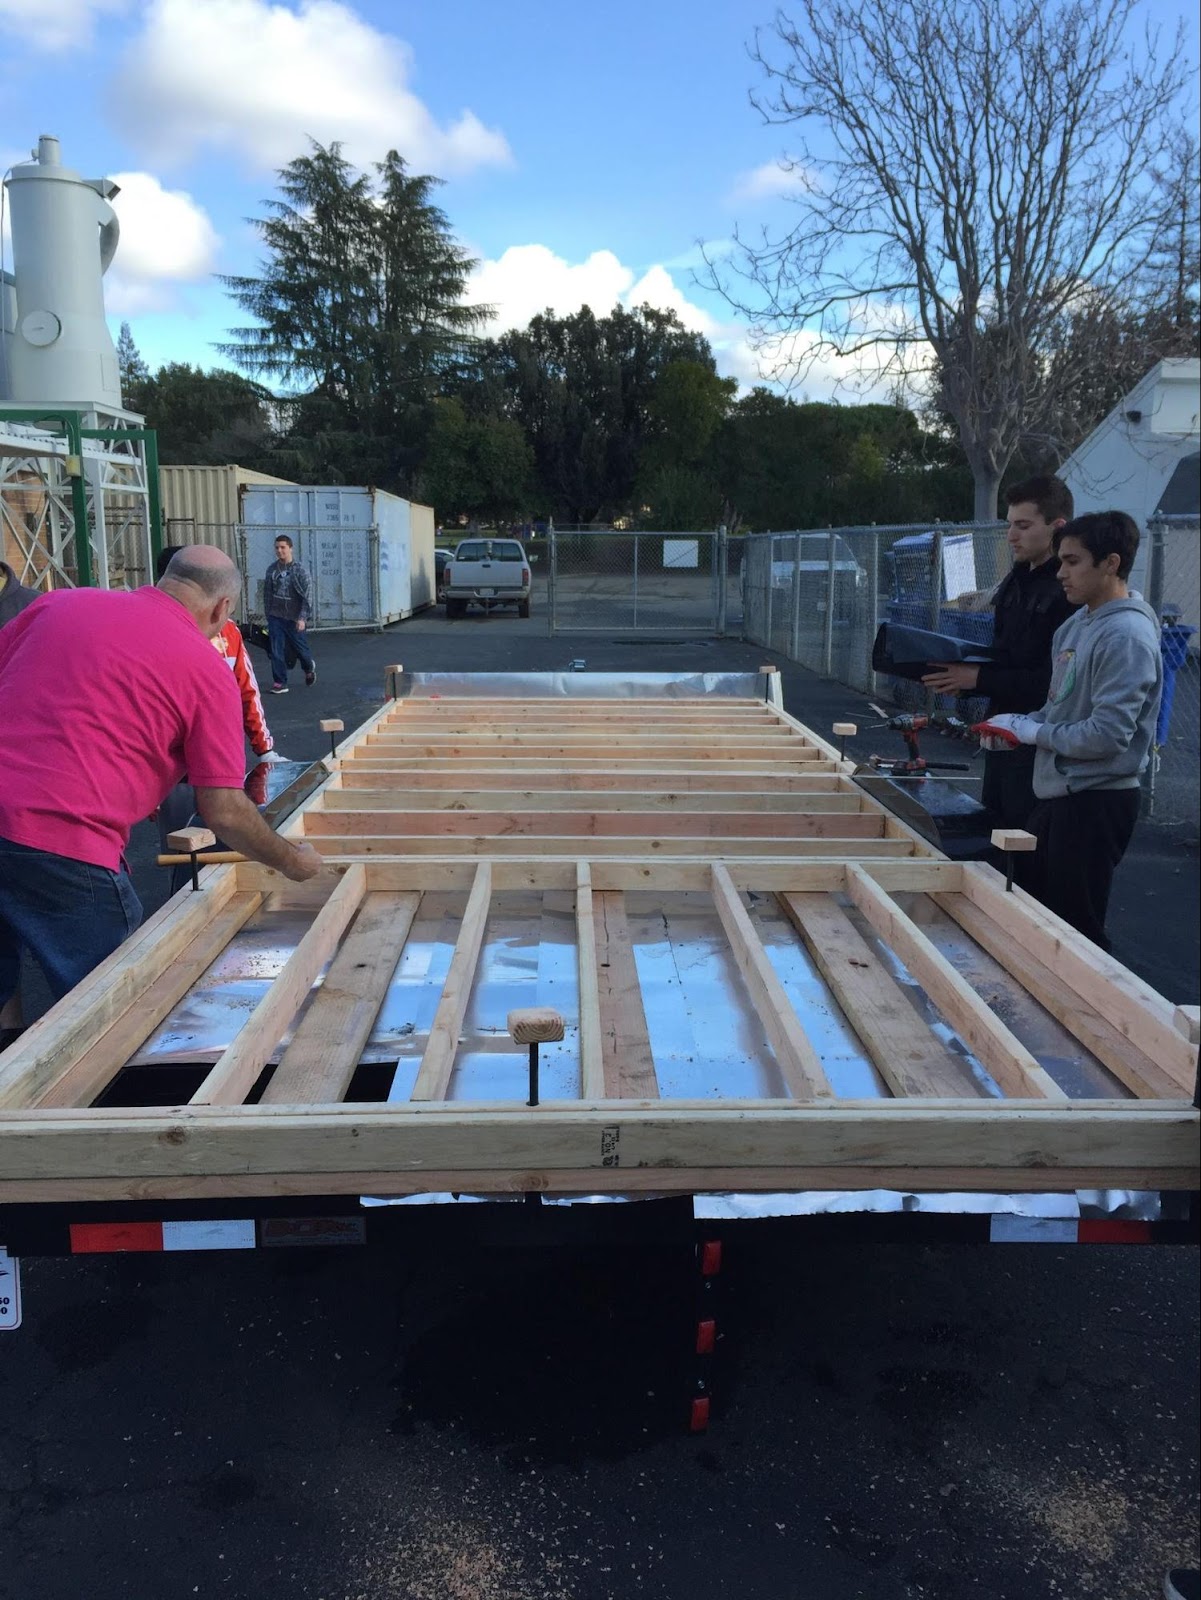
Day Four(12-14-15): The goal today was to place the rest of the floor-framing(girders) on the trailer. It is slowly coming along with diligent efforts and thoughtful planing.(Above Picture).---(Marlon Doppe)
Day Five(12-16-15): This day was an in class day. Our teacher discussed and formed our official crews as well as discuss a plan of action. In order for this project to be successful, our crews must be organized. This goes with any construction task for that matter and that is what our teacher helped us to appreciate. For example, he discussed with us the various types of duties performed on construction sites. Such duties include foreman, lead carpenters, carpenters and a plethora of other positions. In addition, our teacher explained student expectations and responsibilities. Our class understands the severity of this assignment because we realize that people may be be living in this home. Quality is pivotal in this project. Our mindset is to achieve the same level of standards of work that is prevalent on construction sites. This class doesn't just revolve around building a tiny house. This course is to teach students about the construction industry and how to go about a job in a professional manner.---(Marlon Doppe)
Day six(12-17-15): Today, groups were assigned to various parts of the trailer and one group was assigned materials handling. One group took care of the front of the trailer, the next group of around 5 or so was assigned the middle of the trailer and the last group who are in charge of the back of the trailer, constructed the lay out for that section. As mentioned before, there was another group of students who had the privilege off cutting the lumber. Our class has a systematic way of performing this assignment. On that day, each group would measure their portion of the trailer and calculate how much of the lumber needed to be cut and from there, they would bring this to the group that was designated for cutting the lumber. This group quickly and smoothly carried out the task and organized the lumber so that each group would know what has been accomplished. In addition to laying out our floor frames, we adjusted or re-measured the trailer dimensions. Unfortunately, there are no pics for today.---(Marlon Doppe)
 |
| SUB FLOOR |
 |
| DRILLING HOLES |
 |
| SUB FLOOR ON THE TRAILER!!!!! |
 |
| VIEW FROM THE BACK OF THE TRAILER |
 |
| SHED TOWN |
 |
| SHED PROJECTS/TOWN |
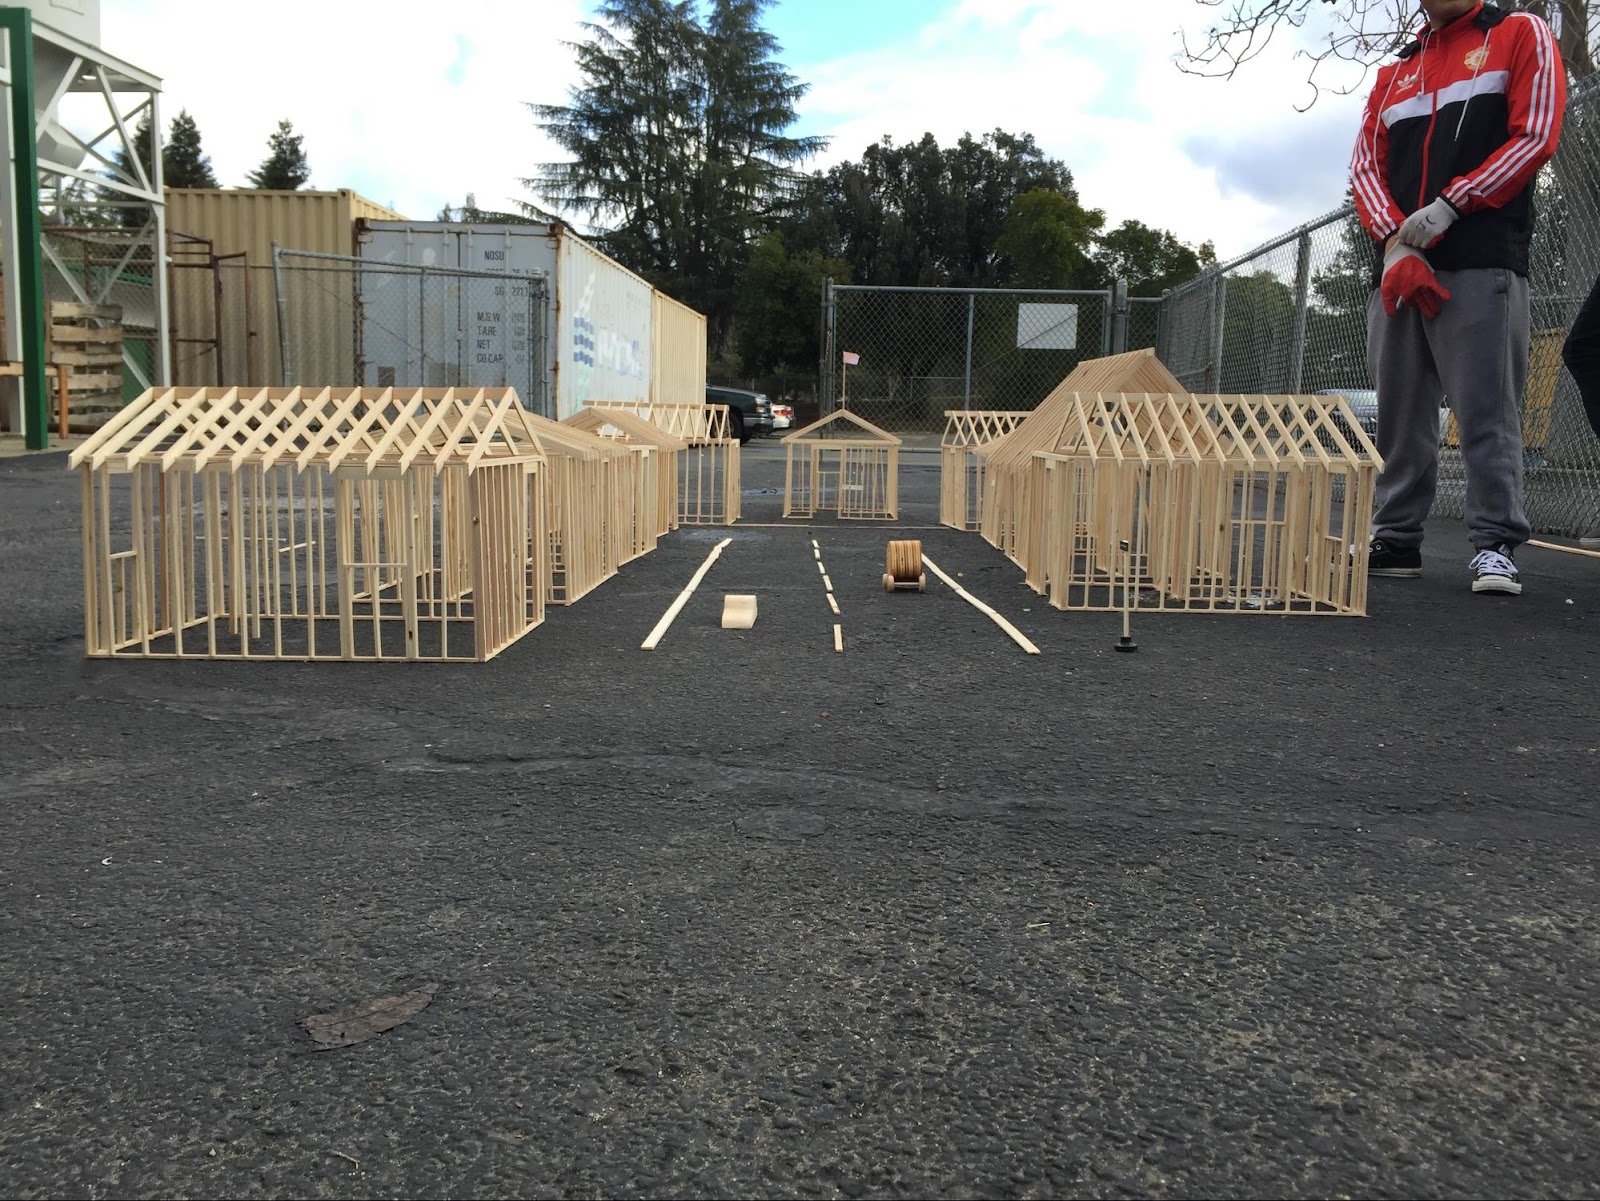
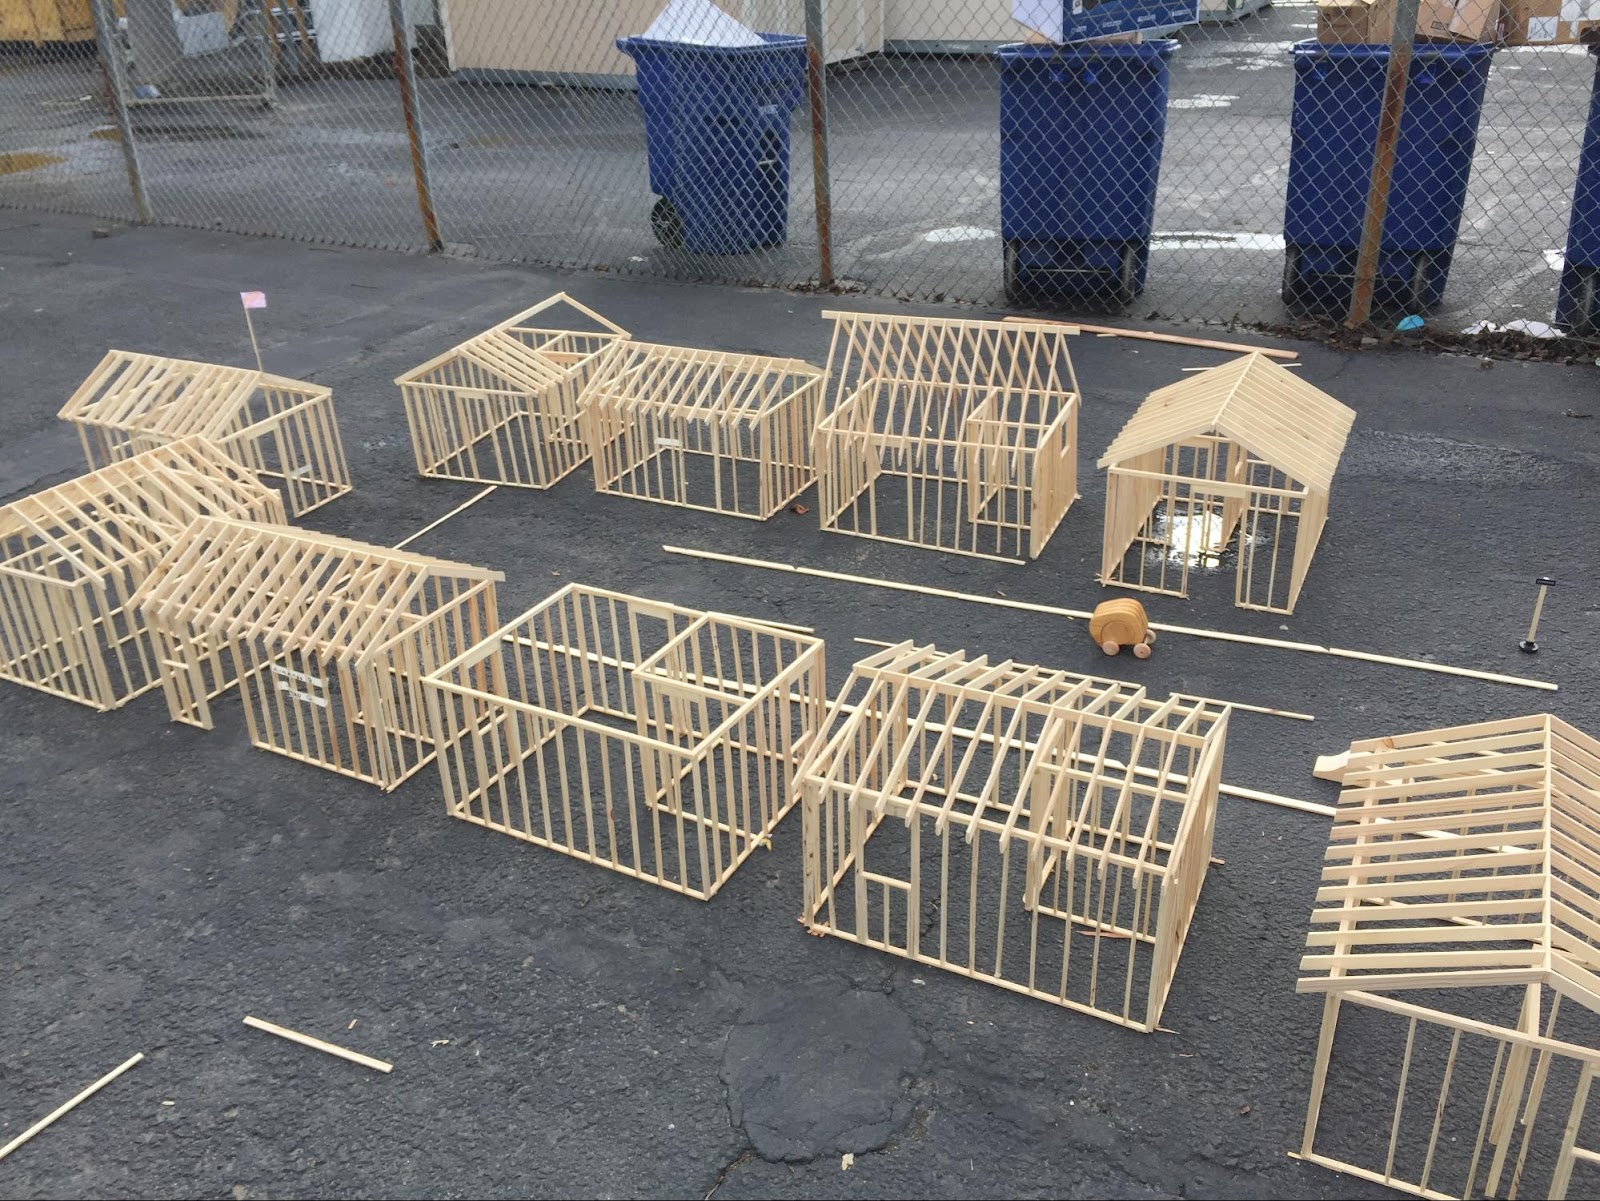
Day Eight(1-7-16): Above this entry, we have posted four pictures. In the bottom two, we had a little bit of fun with a previous project we performed at the beginning of the school year. The project was to build a shed and this project would prove to be of benefit to us. This is the case because we were able to learn how to read construction plans, follow through with those plans, and work effectively as a group. Whether we were successful or not, it was practice for a grander project like this one we are taking part in right now. Along with that, these pictures were of a "town" we made with our projects and we added scraps of wood to create the street lanes and etc. This Tiny House project is hopefully a true testament as to how far we have come since creating these small sheds. After this activity, our class adjusted any of the sub floors that required attention. We did this because we may have missed an area and any error like that could result in serious consequences. Especially since everything we do, every step we take, builds on the next one. After adjusting, each group measured their section carefully to see where they needed to set their sub floor onto the anchor bolts. With all of our concentrated efforts, we were able to get all of our assigned floor framing sections on to all of the 8 total anchor bolts in one shot! This was incredible, considering some of the impediments we faced when constructing the sub floor and getting the measurements exactly precise and accurate. We are on our way to making further progress!---(Marlon Doppe)
 |
| Picture #1 (January 14th,2016) |
 |
| Picture #2 (January 14th,2016) |
 |
| Picture #3 (January 14th,2016): January 14th & 20th: As one will notice in the pictures above and below, our canopy finally arrived in parts and pieces. In its incipient stages, we had to cut some of the metal stands/poles and nail them together as depicted there in Picture#2. After cutting and remeasuring the stands, we set those aside and placed the blue tarp over our already covered trailer. We did however run into some problems with the blue tarp but, the major issue was its durability when it came to the windy conditions as the blue covering ripped certain spots which would inevitably prove damaging to the system we have in lace of keeping the trailer safe from natural causes. In images #4 and #5, the canopy is fully assembled. With collective efforts our class was able to push the stands or poles into the top of the canopy and we placed a new cover for the top of the canopy. Along with that new cover we roped the top of it to maintain its position. In addition, we pushed 55-gallon drums over to where the stands are in order to hold the canopy in place.--->(Marlon Doppe) |
 |
| Picture #4 (January 20th,2016) |
 |
| Picture #5 (January 20th,2016) |
 |
| Picture #6 (January 28th,2016) |
 |
| Picture #7 (January 28th,2016) |
January 28th,2016: As illustrated above in pictures 6+7, our class focused our attention on the sub floor. On this day we relocated the trailer and began preparing the measurements for our sub floor. We then marked off the spots on the floor so that we could place them on the anchor bolts. Some of the edges on the floor had to be cut down and we additionally had to repeatedly nail any unfinished parts of the back of the trailer to ensure that everything was in order.---> (Marlon Doppe)
February 1st,2016: While in class, our teams listened attentively as our instructor described to us the role of insulation within a house or structure, as well as its various components. However, our team unfortunately was not able to install the insulation today but, we were able to complete the sub floor. This proves to us that we are making steps towards the right direction as this project continues on slowly but surely. In the pictures below this synopsis, one will notice our teams working vigorously to prepare the final phases of the sub floor plans. Additionally, we were also receiving beneficial recommendations as to how to use some of the tools properly to produce a greater quality sub floor base. After some time cutting the last few pieces off, we finally placed the last piece on our trailer.--->(Marlon Doppe)
 |
| Last Few Check-ups (2-1-16) |
 |
| Reviewing and Overseeing Floor Plans (2-1-16) |

^^^February 4th^^^

^^^February 4th!^^^

^^^February 9th^^^

^^^February 9th!^^^

^^^February 9th!^^^
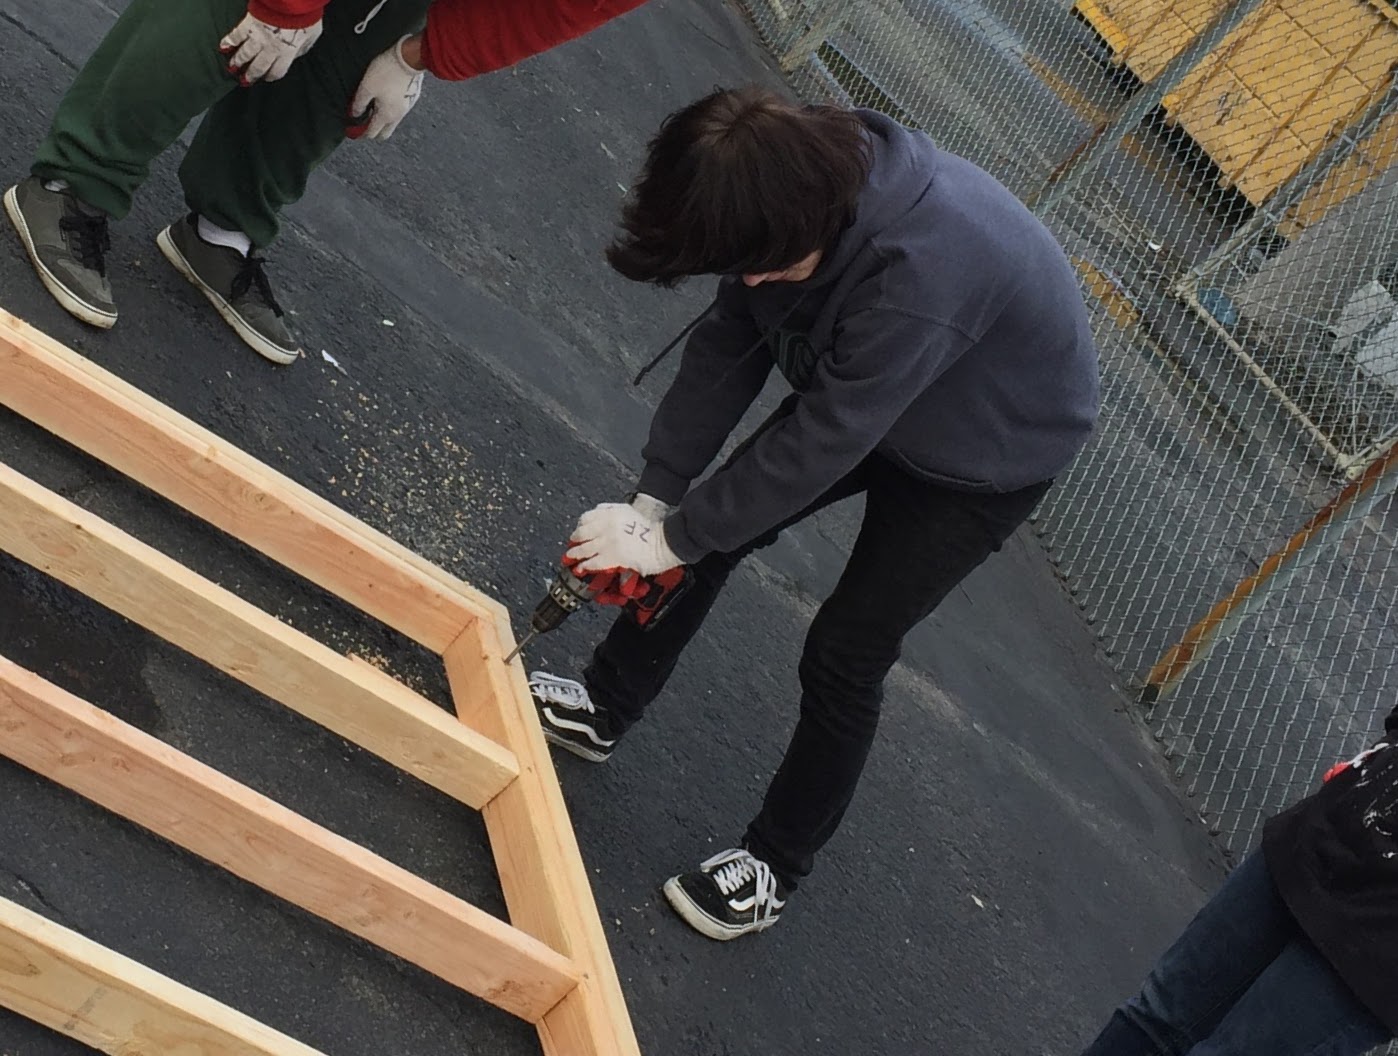
February 4th and February 9th: On February 4th our instructor discussed with us the importance and usage of the nail gun and a plethora of other safety precautions that we as a class needed to apply as we continue to work on getting this sub floor finished. In fact, we considered two, 1 minute long videos that gave us examples of what and what not to do with the gun. These videos provided us with the information our class desired because it gave us a gruesome picture of what will happen if the nail gun strikes any part of the body. In Video 1, we were told to keep our hand held back and to make sure the air pressure is correct. A nail could bend up and go through the finger for example so, it is vital to keep your hand at a distance. In Video 2, we were instructed to keep our hand off the trigger if we are not using the nail gun. He additionally talked with us about the 8 Penny Ring shank Nail which is what was placed inside the nail gun. The nail gun we are using is a 21 degree framing gun and for those under the age of 18, they have to wear poly-carbonate glasses. Again, safety was our first concern before starting any nailing. After our videos and discussion on nail gun safety, we began measuring the floor to make sure we cut the correct size of insulation. On a final point, we also received emails by the Project Lead the Way Program(PLTW) who have interest in the project and it appears that other schools as well may come check it out!--->(Marlon Doppe)
On February 9th, we finally completed nailing the sub floor pieces together. Additionally, we made sure the pieces were in tact and brushed off any excess wood or debris. Later on, we watched a video on wall framing and the various steps required to finish that process and we will keep all of you posted on that.--->(Marlon Doppe)
February 11th,2016: Today there are no photos unfortunately but, we did however make preparations for the wall framing for which we watched a video on the week prior to this day. Each group was assigned and given a wall to work on. Then the groups were given plans for their specific wall. Once those plans were considered, each group began re-measuring the floor plans because some of the measurements on the plans we were given were incorrect. This is the case because the plans are taken from a trailer that does not match ours. Once we re-measured and carefully made the corrected marks on the sub floor and on the plans, we began gathering the lumber. After this, each group carefully made the necessary marks on the lumber we are using for the framing. Next, we began cutting down some of the pieces of the lumber and re-measured them another time. Despite not being able to complete the assigned walls yet, our groups made careful measurements and are on the right track. Before the class was over, each group bundled their wall framing pieces, taped them, labeled them, and then neatly put them away. With all of this hard work we understood the importance of measuring twice and then cutting once!---(Marlon Doppe)

February 16th

Feb.16th

Feb. 16th

Feb. 18th

Feb. 18th
February 16th and 18th Entry: Our floor framing efforts continue yet again as each group members diligently exerted time and energy into putting the pieces together. As beautifully illustrated in the above, immediate 6 photos, many of us had to re measure the parts of our assigned walls and adjust them accordingly to any constraint(s) associated with the wall. For example, many had to take into account the wheel well when re measuring the wall frames as we had to compensate for that. Our goal now is to finish these tasks as quickly as possible with the best quality of results because once the wall frames are done, the house should come together quite smoothly.---(Marlon Doppe)
Additional note: Any Para-Lam pieces we have from cuts we will use for the inside of the house.(i.e. tooth brush holder, utensil holder, etc.) Please leave a comment if you have any ideas for what we should use those pieces for.---(Marlon Doppe)

^^^^February 25th^^^^
Picture 1

^^^^February 25th^^^^
Picture 2

^^^^February 25th^^^^
Picture 3

^^^^February 25th^^^^
Picture 4

^^^^February 25th^^^^
Picture 5

^^^^February 22nd^^^^
Picture 6
February 22nd & February 25th: We decided to group these two dates as one entry due to the fact that on February 25th, we were continuing what we had been working on 3 days earlier. As displayed in the above pictures, particularly on the 25th, our teams made tremendous advancements in the wall framing process. The Wall #3 group was finally able to begin nailing as illustrated in Picture 1 for this entry which was a giant leap of progress from before as there were obstacles when it came to the conflicting measurements between the trailer and the plans we were provided. Additionally, they were able to cut the studs(75", 68", etc.) needed and will soon be able to finally place the frame on the anchor bolts. Along with that we gathered the OSB and one of the groups was able to begin placing that onto their frame and making the necessary measurements to make it fit as precisely as possible onto their frame.---(Marlon Doppe)

March 3rd

March 3rd

March 3rd

March 3rd
March 3rd

March 3rd

March 3rd

March 3rd

March 3rd

March 3rd


March 3rd
February 29th
February 29th-March 3rd: This week has been extremely exciting! Our teams are gaining ground as we continue to put these walls up! Wall 3 as well is coming along quite nicely now that we have the OSB on the frame. Additionally, each individual student now has their own tool belts, framing hammers, snap lines, carpenter's knives and etc! Our instructor gave us some tips as far as where we should place certain items, in order to work more efficiently and protect us from harm. Once everyone was set, each student began preparing their lines by inserting chalk into the snap line and making sure that the blue chalk covered the string completely with no patches of white. After this process, we began working on our walls. As depicted above, almost all of the walls were able to go up onto our all-thread anchors and we began making sure that they stay with additional supports. The snap line gave us a guide that enabled us to cut the wheel well part of our wall. Now that these walls are beginning to make their way onto the anchors, this project should move much more quickly.---(Marlon Doppe)

March 7th

March 7th

March 9th

March 9th

March 14th

March 14th

March 17th

March 17th
Entries for March 7th, 9th, 14th, & 17th: As illustrated in the pictures above on the 9th of this month, our teams took turns using the Sawzall to cut out parts of the OSB where the plans call for windows. Our teams have been using a single chair in order to climb into the house and this chair was located at the back part of our trailer. However, this proved to be a bit unsafe due to the fact it wasn't secured to anything and the rainy weather made our travels a bit slippery. Therefore, our instructor gave a couple of students the task of taking two wooden chairs and cutting them down in order to create some "stairs" for our Tiny house so that our students can easily move to and from the trailer with little chance of injury because safety is a primary concern for our class. After screwing the chairs together and testing its stability, we began organizing our class and measuring the length of the sides of our house in order to place 2" X 4"s around the top of our wall frames. One of the groups had to create a notch in our 2" X 4" because of a metal plate at the top of the frame. We used a skill saw to create that notch. Finally, on the 17th we continued that same process but, also we began installing the floor of the loft. In order to do this, a couple of our students took the floor pieces and measured 92" from both ends, used a speed square to draw a solid line and then cut the floor pieces. This project is coming along so stay tuned...---(Marlon Doppe)

March 21st

March 21st

March 21st
Journal Entry for March 21st: Today was another productive day for our teams. We continued our various jobs whether it be the loft or cutting more 2" X 4"s and spacers(OSB), for the top of our frames. Our efforts had to end about a half hour before the end of the school day due to heavy rain. On the other hand, our district Superintendent, Dr. Nellie Meyer came by along with our principal to check out our work which was thrilling because she was impressed with how well we were coming along on such a significant project. After our work was complete, we had to put up three tarps in the heavy rain which was a challenge as the wind picked up as well. Yet, with team work and quickness we were able to nail the tarps in and cover our house so that the wood doesn't become damaged in anyway which could impede progress moving forward.---(Marlon Doppe)

March 23rd

March 23rd

March 23rd
Journal Entry for March 23rd and 24th: Our jobs throughout the week have been a continuation of loft work, creating spacers/cutting 2X4's for the top of our wall frames and adjusting the front part of the house. On the 24th we transitioned back into wall framing by adjusting the various odds and ends of it as well as remeasure each of our assigned walls.

April 4th

April 4th

April 4th

April 4th

April 7th

April 7th

April 7th

April 7th

April 7th

April 7th

April 7th

April 7th
Journal Entry for April 4th-April 7th: This week has revolved around a lot of continuation work with regards to wall framing as well as the loft wall itself. Additionally, some of the students began working on the roof beam. I believe we are still looking for a way to safely and efficiently put up our complete roof. Our activity for the past few weeks has been primarily focused on wall framing however, the part of the house that has been a topic of discussion in the past was the roof and how to complete that assignment with no error. Making critical errors on the roof means starting over on that component of the house and some of our students found that out while working on the shed projects from last year. Our loft is coming along yet, some of the of the groups who are working on the frames have encountered some challenges. One example of this involves calculated errors that appear on the plans so our groups had to readjust the frame and recalculate it a numerous amount of times. Along the way though we have had to remeasure and check in with our instructor, but the frames are slowly coming together now that the plans are more precise and accurate. We will continue to keep you posted on our progress.---(Marlon Doppe)
Side note(April 4th): Our instructor also gave each of us our own carpenter pencil which helps us tremendously because it obviously makes marking measurement lines ever more evident and plain to the eyes of the worker(s).

April 11th/13th

April 14th

April 14th

April 14th

April 14th

April 14th
Journal Entry for April 11th,13th & 14th: On April 11th we were able to raise the roof... literally! Along with efficiently undertaking that process our teams also began putting the rafter and dormer walls up. On the 13th, we continued where we left off with our dormer walls and had to lengthen one of the sides by another 23.5". April 14th was day in which we cut more rafters that were 64" long, along with more OSB for the loft and the measurements for the width of the added OSB were 34.25" and 35.5". We are advancing at a considerable pace considering the set backs that have impeded some of our progress.---(Marlon Doppe)
Journal Entries for Week of April 18th-22nd, April 25th-29th, & May 2nd-4th: So for the past few weeks we have primarily focused on the rafters and getting the plywood placed onto the roof. Additionally, we completed the blocking required for the house. On the 18th, a group of students began creating plans for a ladder for the loft area. This group wanted to create a ladder that made moving in and out of the loft area accessible and an item to the home that would maximize living space due to its design. To clarify, this ladder would have space or individual boxes inside the ladder so, that any homeowner will be able to store objects without those objects being in the way of a person moving in and out of the living space of the house. Anyway that we can maximize the space within a home, and in particular a Tiny House, makes it more appealing due to its obvious compact size. With this idea in mind, we conducted a survey with everyone in the class to discover which ideas they preferred and recorded our findings. Additionally, one of us went home and measured the height from one step to another on a flight of stairs so that we can use that measurement for the height of the ladder. Despite performing these brainstorming steps, we were not able to begin the construction process for the ladder however, we will have a design to build on later, once we finish the more pressing issues of the house. On the 25th we received a shipment of siding as well as additional materials. In the photos below you will see the rest of our work which as I mentioned before deals with the common rafters and so forth.
--> Key Note: Please visit this link here: https://gofundme.com/2bd9j6kk

^^April 18th: Ladder Brainstorming^^

^^April 18th: Survey Frenzy!^^

^^April 20th: Blocking^^

^^April 21st^^

^^April 21st^^

^^April 25th: Siding/ Shipment^^

^^April 25th^^

^^April 25th: Skill saw^^

^^May 2nd^^

^^May 3rd^^
Journl Entries of May 9, 11, 12, 16, 19: Our Tiny House continues to take form! On the 9th of this month we began placing Tyvek(building wrap), on our house. Additionally, we finished our roof assignments. Two days later, we were able to install one window as well as, continue wrapping our house with Tyvek. On Thursday the 12th, our instructor introduced us to the electrical components of the house. For example, we discussed the measurements for where our wall plugs will be placed, bathroom plugs and the 3 way switch. Along with that, we added 3 more windows,( 2 for the sides and one in the loft area). On the 16th, our instructor explained the importance of the siding material. Along with that, he elaborated on the fact that we needed to stagger those siding pieces. Any split ends on the siding will mean that we have to work around those pieces with the use of a caulking gun. Furthermore, holes on the siding will result in water being able to flow through the walls and seep into the house. Next, on May 18th we had a guest speaker from Spartan College come and talk with us about there campus and opportunities. Finally, on the 19th, some of us began drawing up plans for our cabinets. We accomplished this by calculating the height of the fridge, the height from the base to one part of the rafter to the other due to its slope. Some of us were able cut out those pieces but, we were not able to finish. The rest of the students worked on the electrical part by installing the small, blue electrical boxes.
| May 9th |
| May 9th |
May 12th
May 12th
May 12th
May 12th
May 16th
May 16th
May 16th
May 19th
Journal Entry for Rest of May: Over the past few weeks, our teams have been increasing their efforts, in order to complete the final stages of the house. For example, some of our teams worked on cabinet making. In this group, we had to calculate and factor in the height of the fridge. Along with that, we had to measure various lengths from the floor to the rafters above. However, that group had to temporarily cease that particular task and move onto more heavy duty materials and more weighty assignments that required much needed attention. Another team began creating the stairs that lead to the loft area, but they similarly had to quit their assignment for other responsibilities. In addition to these smaller jobs, our class was able to complete the siding on all four walls. Later on, some our students were organized into a group to work on the electrical aspect of the job. The main task was to install the electrical boxes. Additionally, we began the window framing process. We performed this assignment by measuring the height and width of the windows we have in place. Next we cut 1"x 4" pieces to fit around the window however, we had to cut the pieces at a 45 degree angle. We would first map out the pieces to make sure they fit and the angles were precise. From that point, we would nail one piece in and then place the pieces around it. Nailing the one piece in allowed us to have a starting point in order to, produce the best frame possible. With all of this in mind, we have come a long way in many months of work and the goal to finish is still within our grasp.
As we push to the finish!
This is how the house looked when the Mayor, Chamber of commerce, students, staff, friends and family helped us celebrate our Open House & Ribbon Cutting June 16th!


